In this blog post, we will go through the 'Continue on Error' feature and the 'Data Errors' page under the 'Logs'.
With the recent redesign of our Logs pages, we added the 'Data Errors' page, and below we will explain more in detail how to work with your data on this page.
However, we will start by explaining the 'Continue on Error' feature as this feature forms the basis for the 'Data Errors' page.
'Continue on Error' feature
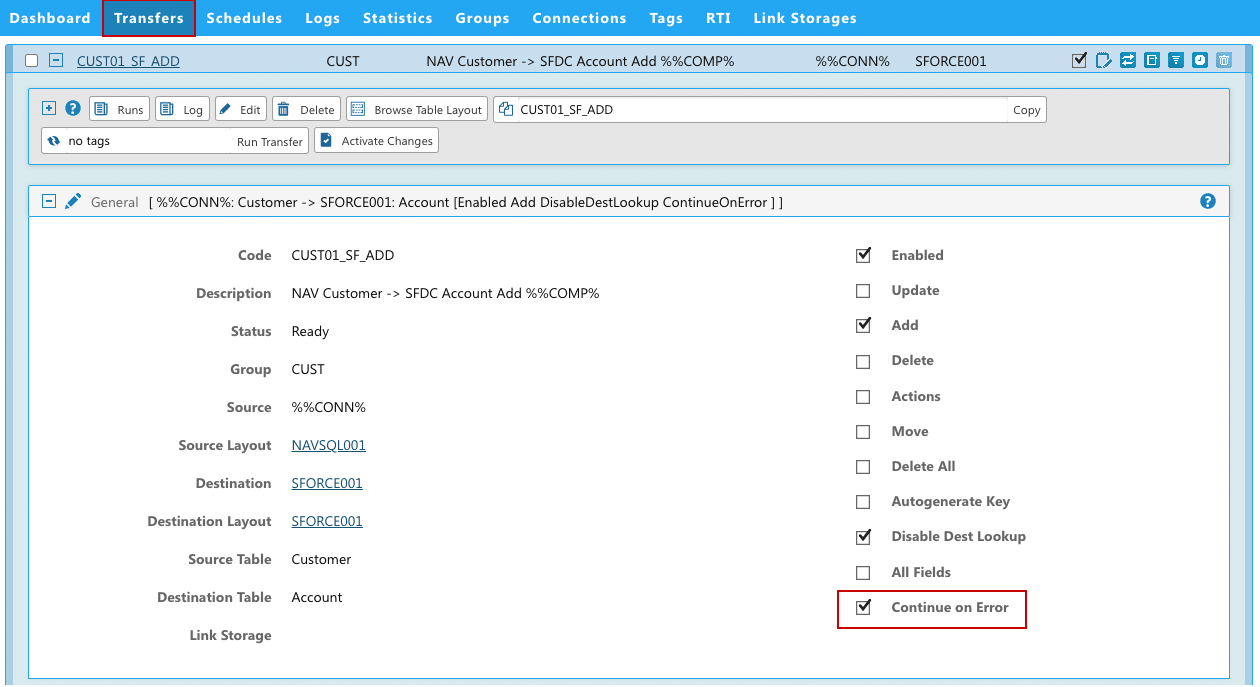
image: Transfers > General > Continue on Error
The 'Continue on Error' feature is located under 'Transfers' > General.
- By checking this field Rapidi will continue to transfer data even if some records fail to be saved to the destination system (due to data errors or validation errors in the destination system).
- The erroneous records are skipped and a Log entry concerning each of these records is generated. These log entries can be found under the 'Data Errors' page.
- This feature might be useful if you have a large amount of data you wish to transfer all at once regardless of any validation errors.
However, we recommend using this feature with caution (especially in combination with source control) as when enabled the erroneous data is NOT transferred automatically again. You will have to take action and fix the data (change the records) in the Source system in order for Rapidi to try to transfer these records again.
Data Errors: the workflow
To make it easier for you to manage these data errors deriving from the 'Continue on Error' feature we have created a separate page 'Data Erors' to show only these kinds of errors.
We envision this workflow:
- You have the 'Continue on Error' feature enabled on certain Transfers.
- Due to data errors in your Source system (and when the Continue on Error is enabled on a Transfer), a log entry is generated and visible on the 'Data Errors' page.
- Go to "Data Errors" under Logs to view the data errors. Each line represents a data error. A data error is marked with a red icon with an exclamation mark.
- Resolve the data errors in your Source System.
- When resolved go back to the 'Data Errors' page and mark them as resolved either
- by clicking the red icon with an exclamation mark and marking it as resolved or
- by selecting the data errors in question and changing their status to resolved via the drop-down 'change resolved'.
- To manage and keep track of your progress in resolving the data errors you can use the filter: 'only resolved / not resolved' to get an overview of which data errors still need attention and still need to be resolved.
The Data Errors page will show the data errors generated by the 'Continue on Error' feature, but as these errors are due to an error or multiple errors in the Source system, Rapidi cannot resolve them automatically. Hence, it will be up to you to resolve them - mark them as resolved/not resolved - and then run the Transfer(s) again.
Data Errors: overview
In the image below we explain the information shown in each line (log entry for this data error).
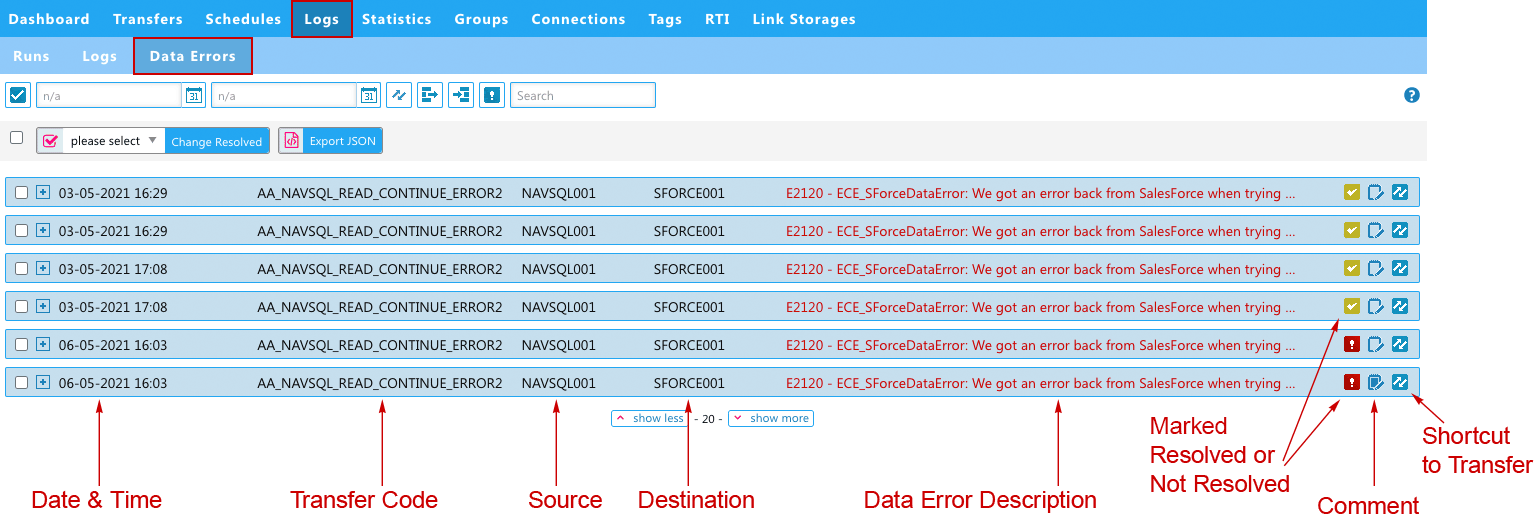
image: an overview of all Data Errors
The Data Errors page shows a list of data errors deriving from the 'Continue on Error' feature.
In each line for a data error you will have information about:
- Date & Time
- Transfer Code
- Source & Destination
- A description of the Data Error
- And to the far right:
- an icon indicating whether the data error has been marked as 'resolved' or 'not resolved',
- the possibility to add a comment (when comment the icon will be filled out) and last but not least
- you can click on the transfer icon that takes you to the Transfer in question
On this page, you can view and mark your data errors as resolved when you have resolved them in your source system.
Below we will illustrate two ways how you can view the data and how to work with this page:
Data Errors: Filtering on Resolved
There are a few options to view the data. First of all, as illustrated in the first image below, when you go to the Data Error page the filter is already set to be 'Not resolved' - meaning you will see all data errors that are not marked as resolved. When not resolved the data error is marked with an icon with a red exclamation mark. These should probably be the data errors that are urgent to take care of.

image: Data Errors with filter 'Not Resolved' applied
To view all the data errors (whether marked as resolved or not) just disable the filter. The data errors marked as resolved will be marked with an icon in green with a checkmark (as you can view in the image below).
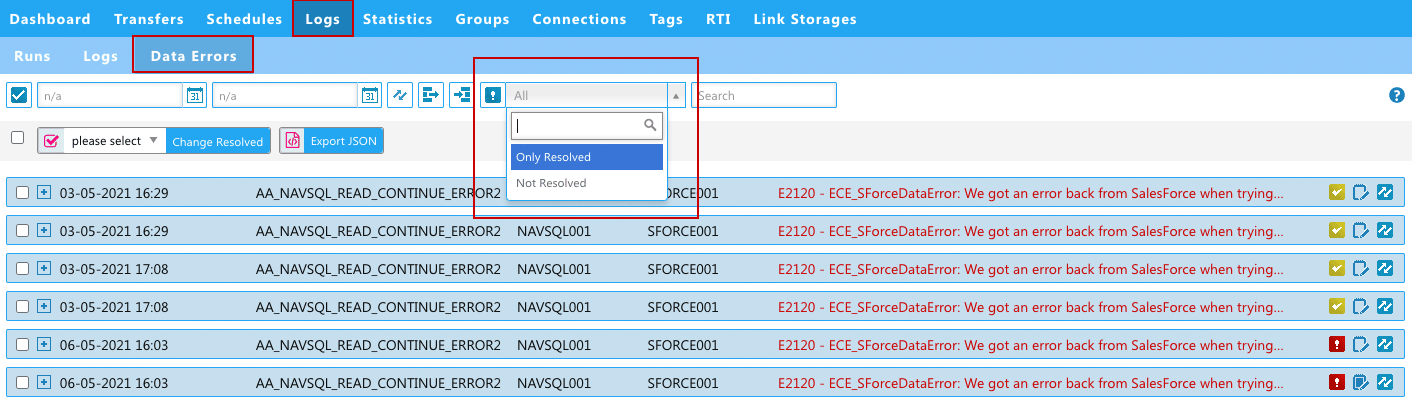
image: Data Errors > Filter: Only Resolved / Not Resolved
Data Errors: Mark as Resolved / not resolved
As outlined in the workflow above, you should return to the 'Data Errors' page after you have resolved the data errors in your Source system, find the specific data error you want to mark as resolved, and simply click the red icon with the exclamation mark and mark this data error as resolved. The icon will then turn green with a checkmark.
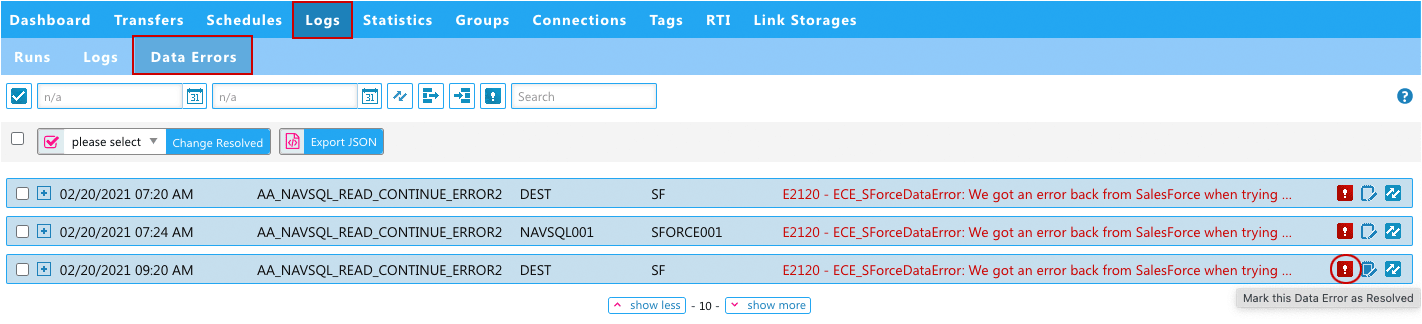 image: Data Errors > Mark data errors as resolved (or not resolved) by clicking the error icon in the line itself
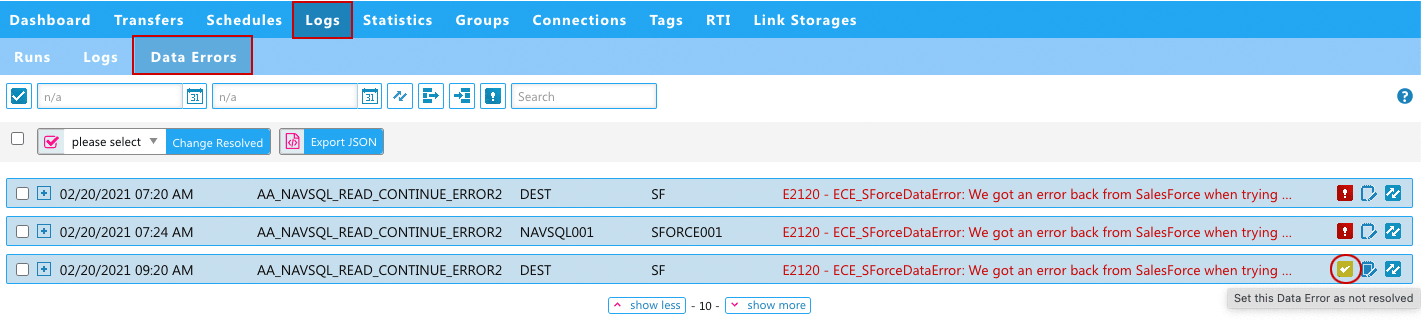
image: Data Errors > marked as resolved via icon > when marked as resolved icon turns green with a checkmark
Data Errors: 'Change Resolved' Feature
Another way to mark your data errors as resolved is to do it via the select functionality and then change the status of the selected data errors via the drop-down 'Change resolved', as illustrated below. 1) Select the data errors you want to mark as resolved/not resolved (see image below).
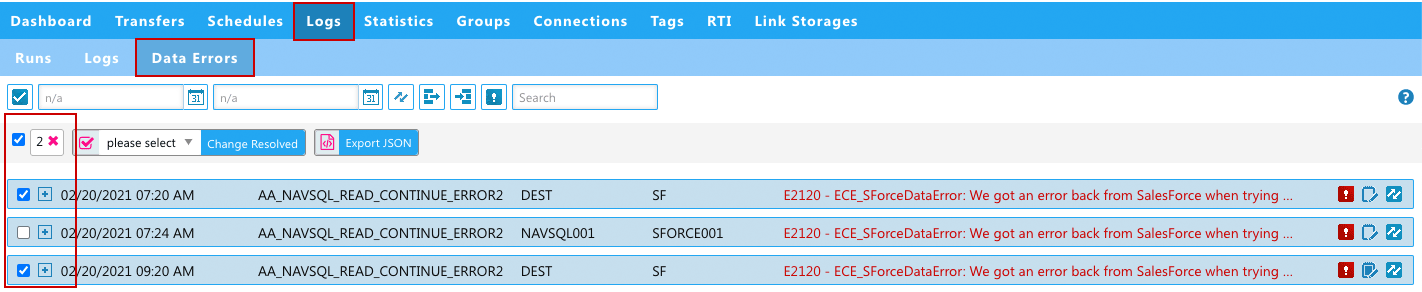 image: Mark data errors as resolved (or not resolved) via select and ‘Change Resolved’ feature > 1. step: select Data Errors
2) then via the dropdown you change the status to either 'Resolved' or 'Error' or you can toggle between those two and then click 'Change Resolved' (like illustrated below).
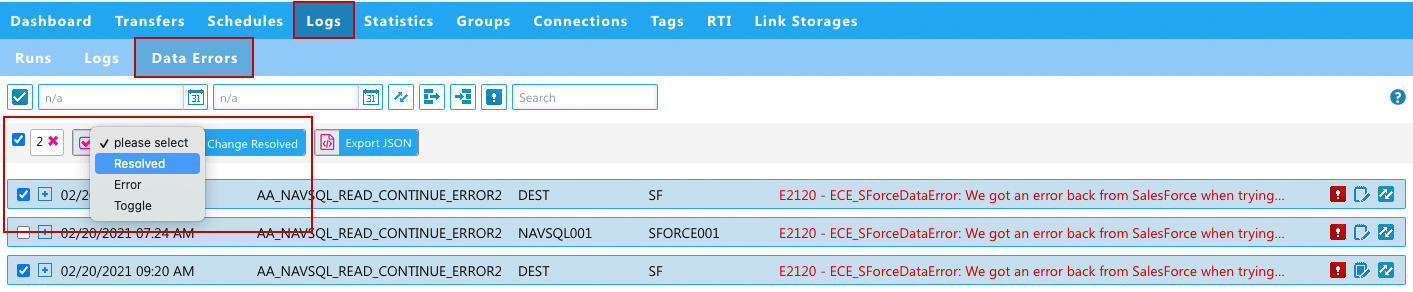 image: Mark data errors as resolved (or not resolved) via select and ‘Change Resolved’ feature > 2. step: choose a status in the dropdown
After changing the status, the red exclamation mark icon will turn green with a checkmark (as illustrated below).
 image: Mark data errors as resolved (or not resolved) via select and ‘Change Resolved’ feature > 3. step: after status change the selected Data Errors with be marked with the green checkmark icon
Voila, that's how you can manage and keep track of your work regarding the data errors deriving from the 'Continue on Error' feature.
Please let us know what you think.
Review our latest product update webinar where we explain the 'Continue on Error' feature and the 'Data Errors' page.