NEW RELEASE OF THE MYRAPIDI Configuration Interface
Dear Rapidi User, you might have noticed that we have been somewhat quiet all these pasts months, but we have been working intensively on the new release of the MyRapidi Configuration Interface and even-though it is still in BETA we invite you to start using it on app5.myrapidi.com. The new version and the current version will be running in parallel during the BETA period and you can always use the current version in case you prefer.
You will use the same login credentials and it will be the same data you are working with on the app5.myrapidi.com as on myrapidi.com - so you will actually be working with your live system in both cases.
Also, we would very much like to hear from you if you have any comments, issues or ideas. Your feedback will help us improve the application.
So what's new ?
In general we have upgraded the entire technology stack (server OS, database, application server) to ensure that our application is as secure and performant as possible. We have put a lot of work into making the application run faster and scale better.
For the user interface we are constantly working on to support all devices like mobile phones, tablets and desktops. We have also changed the design of most icons and buttons to align better with the functionality and give a fresher look and feel.
Below you can read about many of the changes that we made to the user interface.
Navigation: Personal & Account Settings
Personal Settings

In order to streamline the navigation inside the app we have moved the personal settings for each user under the settings gear icon and have the blue navigation bar including the menu items. Before we had both personal settings and account settings for the Administrator under the settings gear icon and visible on the service list page. The navigation will not be visible on the service list page anymore as it is in the current version, as we did not find it relevant on that page.
Account Settings

Account Settings which is available to the Administrator has been moved under the utensil gear icon where you can manage and create users, set your password policies, manage access rights and see the activity history of all users.
Navigation: Services & FAILING Schedules
Services
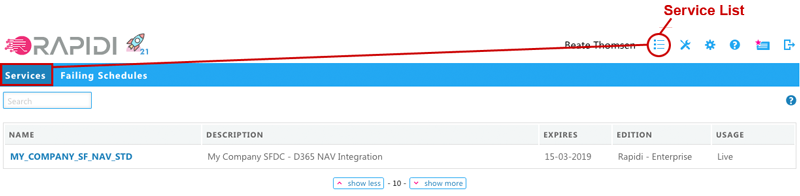
The Service List should be more readable and user-friendly on both desktop, tablet and mobile devices. As mentioned above you don't have the settings menu to the left, which gives more room for essential information of the service list; such as name, description, expire date, edition and whether it is a live, trial or test service. It will show you a description if it is a live or a test service and when it expires. The setup of email addresses for the Schedule monitoring has been moved to Account Settings > Schedule Monitor.
Failing Schedules
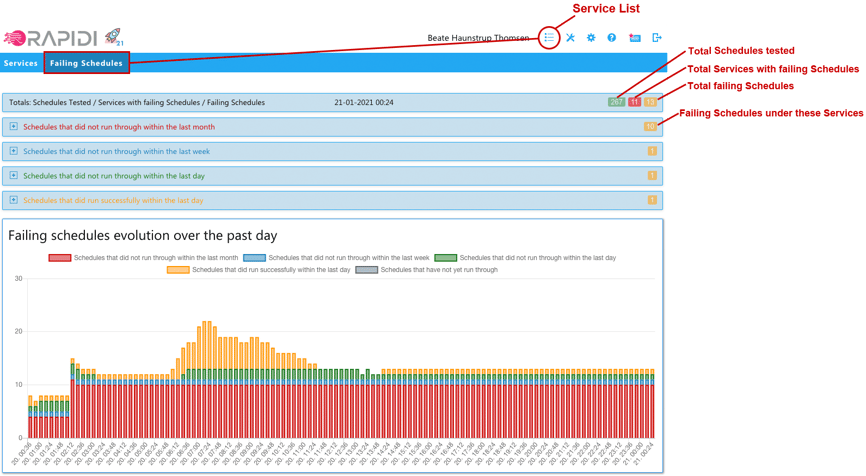
We have added a new feature that shows a list of all currently failing Schedules across all Services that you have access to. They are grouped by how many days the Schedules have been failing. You can view the Schedules that did not run through within the last month, last week and last day. Lastly, you can view the Schedules that did run the last day but are not running now at this current moment. In addition you find a graphical illustration on the evolution over the past day of the failing Schedules

The failing Schedules page should give you a quick overview of the failing Schedules and the possibility to get quick access to the relevant areas in order to take action on the issue.
When expanding you will have the list of failing Schedules with
- Service Name with links to the configuration
- Name of failing Schedule with link to this Schedule
- Last date and time when the Schedule run through successfully
- Link to the runs of this Schedule
2FA: Remember me
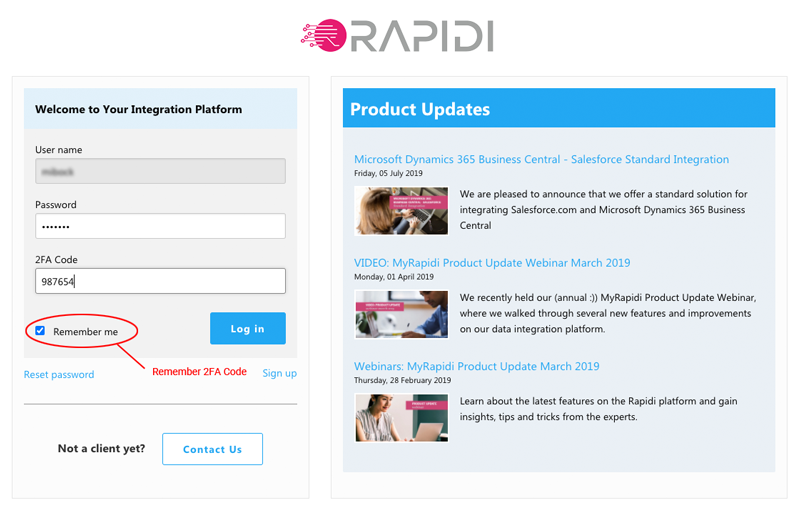
On the login page it is now possible to use the "Remember me" check box in order for MyRapidi to remember you for 14 days in a specific browser. When checked "Remember me" MyRapidi will not ask you for the 2FA code in this browser and on this device during the next 14 days. This feature should make it more convenient for you to have the added security of using 2FA on your trusted computer or device.
Action Bar: Improved readabiility


The action bar - as we call it - where you have the general features relevant to each area should now be more clear and user-friendly as we have changed it visually to be more clear on which button belongs to which feature.
Transfers: Additional features for selected transfers

Under Transfers there you have the ability to "change enabled”, "change group” and “delete all" on selected transfers.
Change Enabled
- You can change selected Transfers to be 'Enabled' or 'Disabled' or 'Toggle' between either 'Enabled' or ‘Disabled'.
- Choosing 'Enabled' will enable the selected Transfer(s), Choosing 'Disabled' will disable the selected Transfers(s). The 'Toggle' option will toggle between Enabled and Disabled. For example, if you have an enabled transfer it will change it to disabled and on the other hand, if you have a disabled transfer it will be changed to enabled.
- This is convenient if you have multiple Transfers you would like either to be enabled or disabled.
Change Group
- You can change the Group of selected Transfers
- Select the Transfer(s) you wish to change and choose a group from the drop-down and click 'Change Group' and the chosen group will be applied to the selected Transfer(s)
- This is convenient if you have multiple Transfers you with to add to a group in a quick way
Delete All
- You can delete all selected Transfers
- Select the Transfer(s) you wish to delete and click 'Delete All' and all the selected Transfer(s) will be deleted.
- You still need to disable Transfers before you can delete them.
- This is convenient if you have multiple Transfers you would like to delete in a quick way.
Read more about Transfers on the wiki.
Priority Feature on Schedules
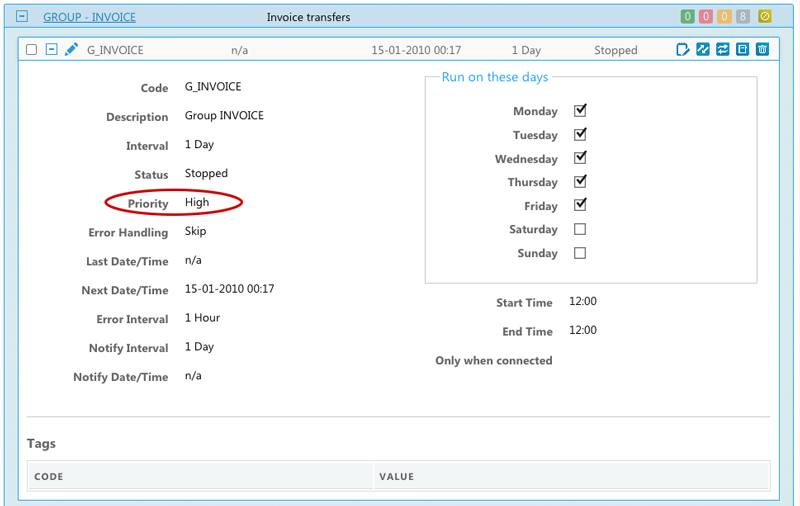
In the App5 release, you can specify the priority on a Schedule
Choose between the following options:
- High: If you have Schedules that need always need to run on time, you can use our "High Priority" feature - this will run the Schedule before other normal-priority Schedules when the Schedule is due to run. You might also consider adding another schedule process (service process) to be sure that these high-priority Schedules are run on time.
- Normal: If there are no Schedules due to run that have the priority set to 'High' the Schedules with priority 'Normal' will run
- Low: If there are no Schedules due to run that have the priority set to ‘High’ or ‘Normal' the Schedules with priority 'Low' will run
- Requires version version 4.1.02e (09-10-2019) or later
Read more about how to Setup Schedules on the wiki.
Schedule Monitoring
We have released are a more fine-grained way of managing your Schedules Notification emails and moved the setup to Account Settings > Schedule Monitor which can be accessed by Account Administrators.
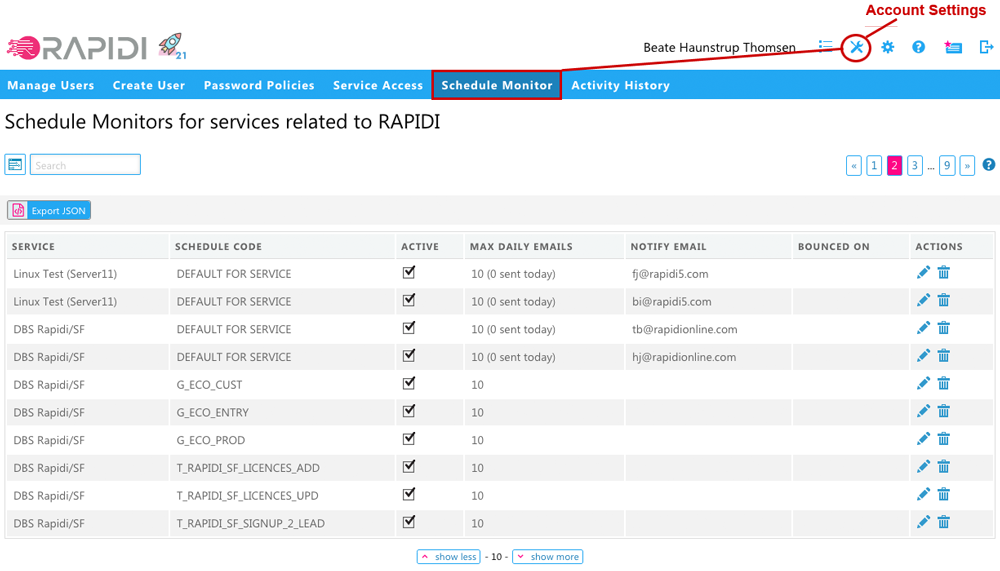
- Monitoring all active Schedules if they run within scheduled time + notification interval
- Each notification email concerns only one specific Schedule with a link to that specific error or issue.
- “DEFAULT FOR SERVICE” -> used when no entry for a specific Schedule
- If no email address is specified -> a DEFAULT FOR SERVICE entry is generated for each Account Administrator's email
- Entries for a specific Schedule that takes precedence over the DEFAULT FOR SERVICE email address.
- Add multiple email addresses separated by comma (,)
- Disable sending emails by unchecking the "Active" checkbox.
- Limiting the number of emails sent per day to "Max. Daily Emails” (default 10).
- If an email cannot be delivered then marked as “Bounced”
Read more: Schedule Monitor and our blog post on Improved Schedule Monitoring
Pagination: Show more or show less
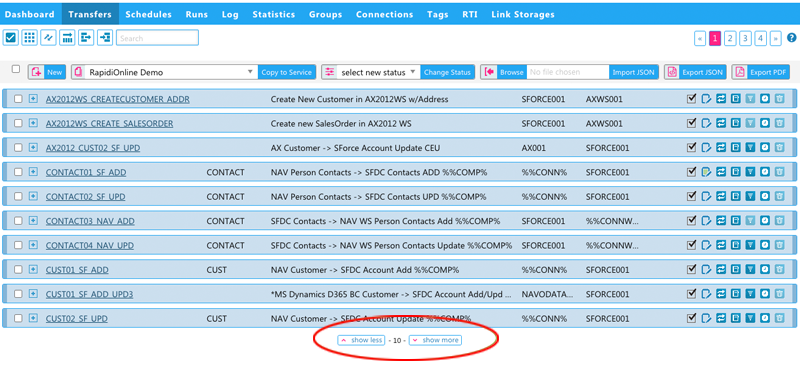
With this new feature, you can select to show more or fewer records/lines on a list page. For example for Transfers, we currently show 10 transfers per page. Clicking on "Show more" would shift to 20 transfers per page, and clicking on "show less" would change to 5 transfers per page. This setting is then remembered for you on this specific device and per page and for each specific page. This gives you the ability to choose how many records/lines you would like to work with on each specific page and on each device.
Take a live tour of MyRapidi
Watch or re-watch our Product Updates Webinar 2021 on what's new on the integration platform. Also, if you haven't already subscribe here to receive notifications via the Product updates blog to stay tuned on product releases and updates.

Let us know what you think, feel free to give us feedback or contact us if you have any comments or suggestions.