We are happy to announce our MyRapidi REST API.
The MyRapidi REST API can be used to automate many different tasks related to working with the MyRapidi configuration. In this blog post, we will focus on one specific scenario in order to learn how to use the REST API.
We have chosen a scenario where we will update a specific Schedule to run now and also check the status of that schedule.
Again, in order to learn how to use the REST API, we will use a plugin to chrome called RESTlet. When actually implementing this scenario in your environment, you will most likely use another tool, depending on your environment.
In order to use the MyRapidi REST API, you will need a login (and password) for an active MyRapidi account with an active Service (you will need the service Id that can be found in the URL when you log in to MyRapidi).
Note: In the below examples you need to substitute the login and password with your own login and password and also substitute the Service Id (80) with your own Service Id.
PROJECT OVERVIEW
To get started, you will first need to install the Chrome plugin in your (Chrome) browser.
Once that is done, here is the main screen you see once you open the plugin:
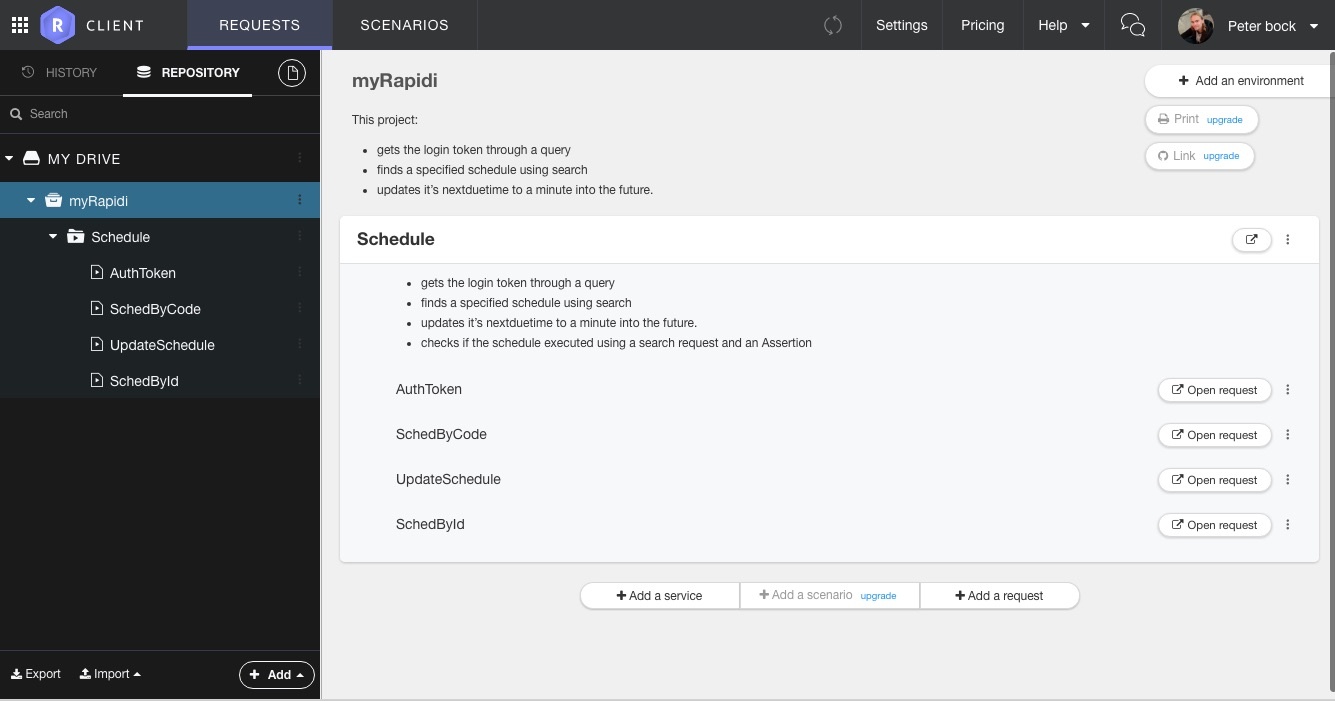
As you can see, we've already created a project, and a Scenario, which is simply an ordered list of requests that will be executed one after the other, containing the necessary requests to :
- Get your Authentication Token, using your myRapidi login and password (AuthToken).
- Get a specific Schedule's information by searching for its name. We've chosen a schedule named G_CUST (SchedByCode).
- Update the Schedule, using its ID (found using the previous request) to be run now (UpdateSchedule).
- Check if our schedule was run properly (This request can be called several times, or after waiting some time, to be sure the Schedule was indeed executed), also using its ID (SchedById).
To create the project, schedule, and requests you see above, simply use the  button to create the project, then the Scenario, and finally the four requests inside the Scenario.
CREATING THE AUTHEnTICATION TOKEN REQUEST (AuthToken)
To create a request using the syntax used in our MyRapidi REST API, we use RESTlet's Request Constructor.
Here's the correspondence between how the example curl requests in our REST API documentation are written, and how it looks in the Request Constructor:
in our documentation for the Authentication Token request:

in RESTlet's Request Constructor (Notice the absence of the \ symbols and the biggest "" pair from the body content, as compared to the curl command):

Re-using the result of previous queries:
Expressions are a feature of RESTlet that allows us to easily use parts of preceding requests, including their results, in future requests.
Getting the SCHEDule REQUEST (SchedByCode)
Let's see how we can use this to get the Schedule we want, which in this case is the G_CUST Schedule:
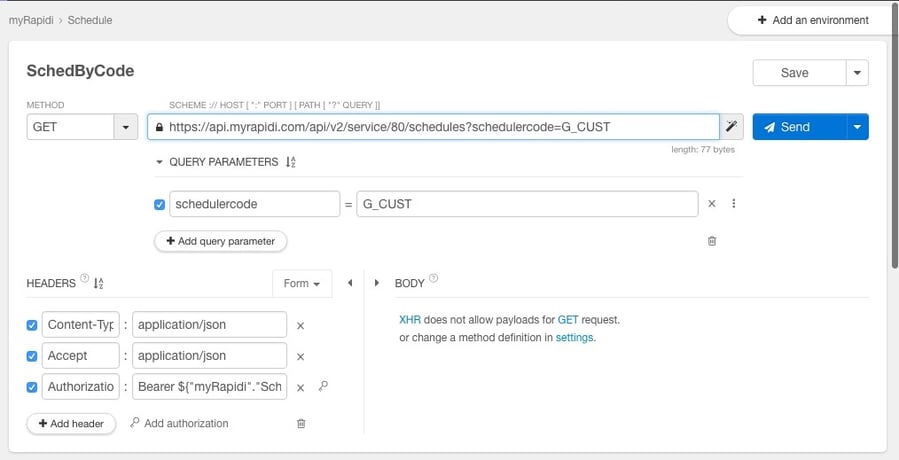
As you can see above, we add a Query Parameter, searching for any schedule having the value G_CUST in its schedulercode field.
The interest of the Expression tool in RESTlet can be seen in the value of the Authorization header, which contains the word "Bearer", a space, and an Expression that links it to the result of our Authentication Token request, as shown below:
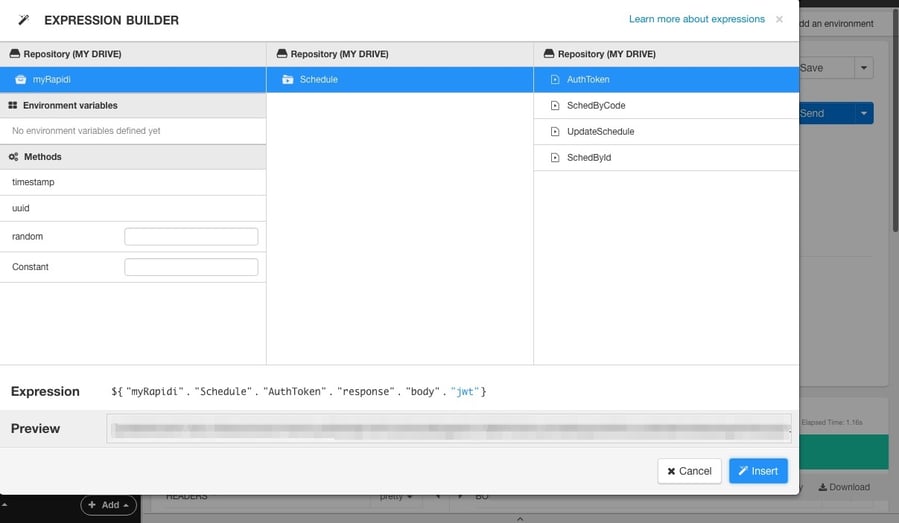
The Expression Builder allows you to visually walk through the projects and choose the requests you want information from, and what information you want to extract.
As you can see, here we extract the jwt field's value (corresponding to our authentication tokens) from the response body of our AuthToken request, which is contained in the Schedule Scenario, inside our myRapidi project.
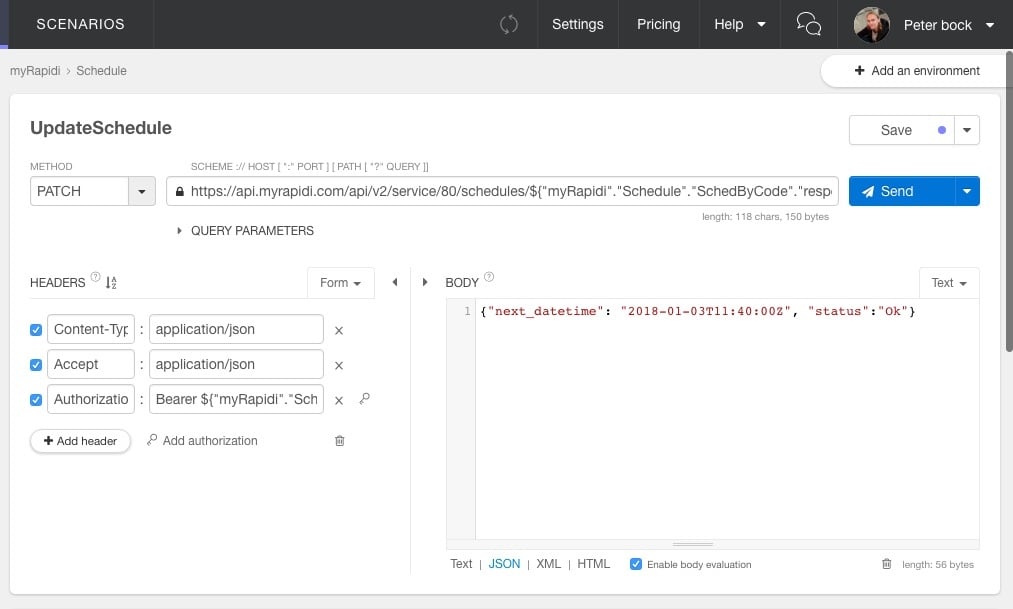
Getting the SCHEDULE to run now (UpdateSchedule)
Now that we have the Schedule, we can use its ID to update it and make it run now:
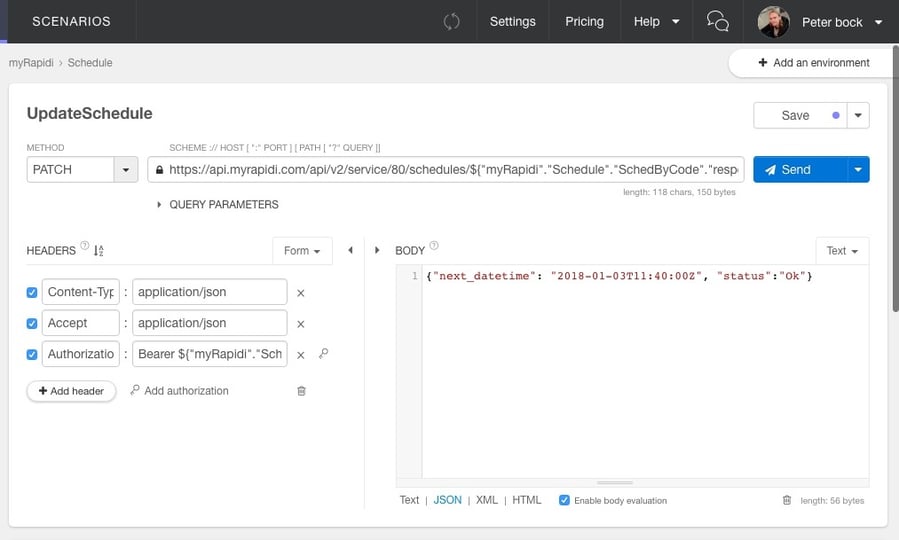
Here we use another expression to get the ID of our Schedule, that we got back in the response data of our last request:
Now that we've updated the Schedule to run now, we can use a request to check that it has, indeed, run.
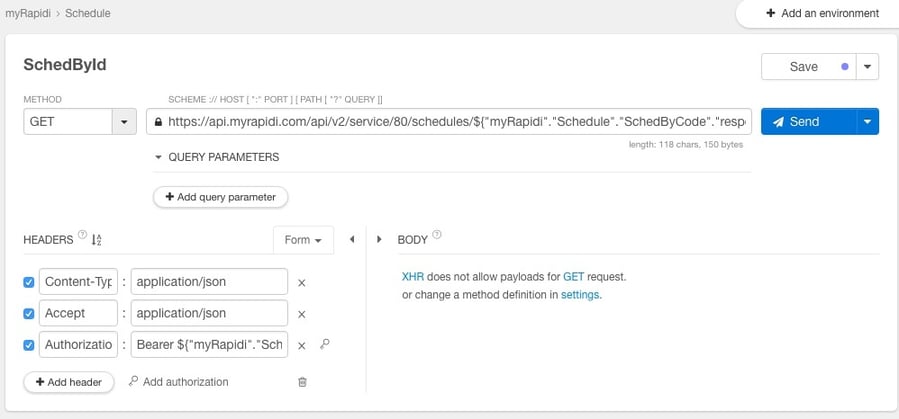
GETTING SCHEDULE STATUS (SchedById)
This last request is really no different than the SchedByCode request, except we use the Schedules ID as an easier way to locate it:
There we go.
We've now managed to get our hands on a Schedule and update its nextdatetime field so that it is run now.
With this, you've been able to learn about our REST API in a system that lets you test basic requests easily.
We hope you've enjoyed this walk-through, and that it has helped you.
If you need any help please contact support.
This post was contributed by Peter Bock who is in his last year in Bordeaux Bioinformatics Master of Science, combining his passion for computers and technology with his interest in biology. He has been testing the MyRapidi API and while working with it in an editor resulted in this blog post. Peter's Linkedin Profile