We are pleased to announce our new Rapidi Service Access Management feature. With this new release we have totally re-worked the way we manage and control access to the Rapidi Services. The access to a Rapidi Service is now much more fine-grained and flexible. Access levels range from a pure 'read-only' access to having edit rights in all areas and you can control edit access to the different areas of the MyRapidi application.
For each user that needs access to a Rapidi Service a 'Service Access entry' has to be created under the MyRapidi Account Settings. This can be done by the Rapidi Account Administrator (usually the first person signing up for the Rapidi Service).
The new release is scheduled to be activated on Sunday July 29, 2018.
ACTION REQUIRED: Each Rapidi Account Administrator needs to add Service Access entries for all users as described below shortly after this release.
Default Access: No Access!
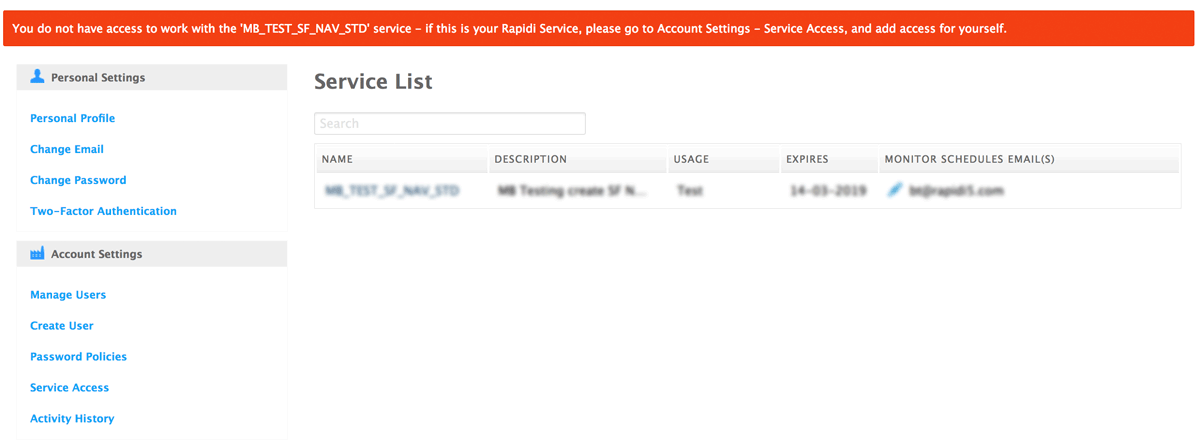
By default, a user (also the administrator) does not have access to any Services. On the Service List page you can still see the list of Services (for now), but when you want to access your service you will get an error message as shown in the image below. But don't worry, below we will describe how you can get access to your Service again following some simple steps.
ADMINS: ADDING YOURSELF TO THE SERVICE ACCESS
The Rapidi Administrator has access to an area inside MyRapidi called 'Account Settings'. Here an Administrator can manage access to each Service associated with their Account.
Please note: A Rapidi Administrator can now also give the ADMIN right to other users on the Account and there can be several Administrators on each Account. This is done under 'Account Settings' > 'Manage Users'.
In order to give access for yourself to your Rapidi Service please go to 'Service Access' and add yourself. First select the Service and then from the second drop down you can select yourself amongst all the users associated with your Account. Then click the 'add service access' button.
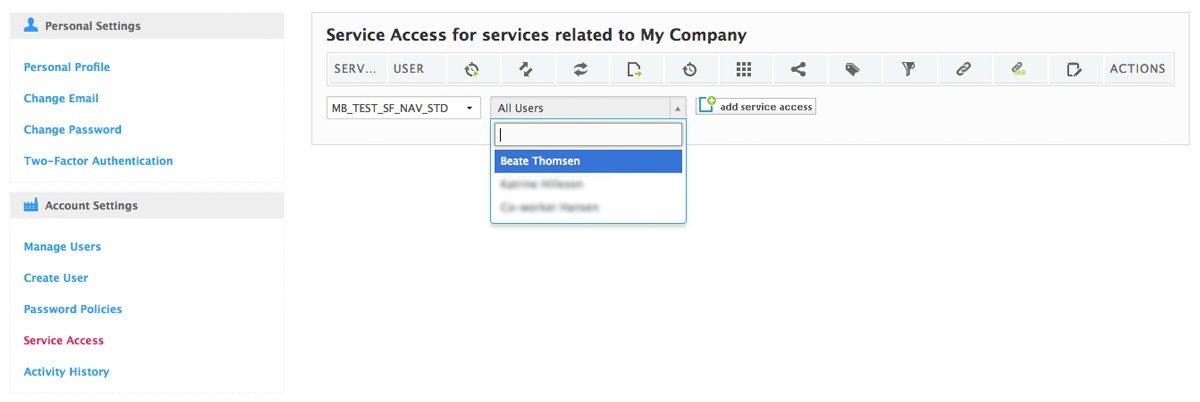
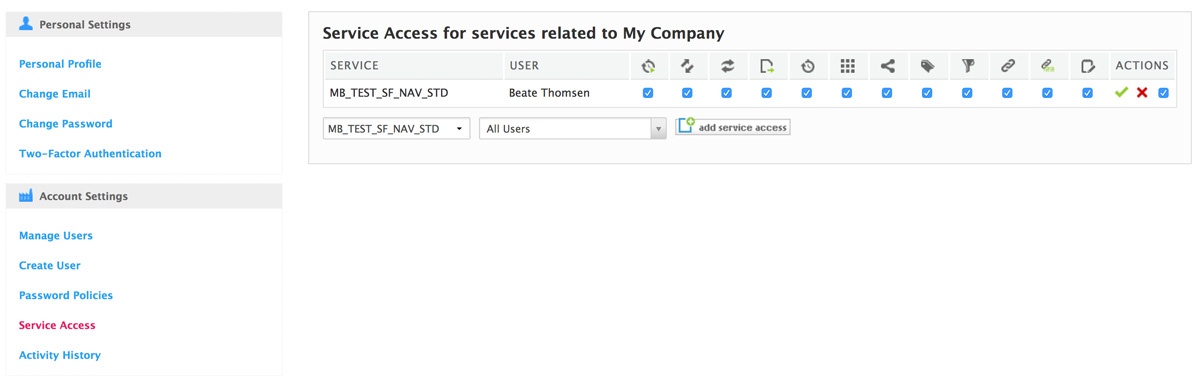
This will create a 'Service Access entry' and you can check the areas you would like to have edit rights to. Click save (green validation mark). If you want access to all the areas just click the 'select all' checkmark all the way to the right.
Below you have an overview of the icons used and their meaning.
 |
Start Schedules |
Allowed to select and start Schedules (but not edit, delete or create Schedules). If the user also has the 'Edit Schedules' right then all selected Schedules will be set to run now. Otherwise only Schedules that are currently running (not 'Stopped') will be set to run now.
|
 |
Edit Transfers
|
Allowed to edit, create and delete Transfers |
 |
Run Transfer
|
Allowed to run Transfers manually |
 |
Activate Changes
|
Allowed to Activate Changes |
 |
Edit Schedules
|
Allowed to edit, create and delete Schedules |
 |
Edit Groups
|
Allowed to edit, create and delete Groups |
 |
Edit Connections
|
Allowed to edit, create and delete Connections |
 |
Edit Tags
|
Allowed to edit, create and delete Tags |
 |
Edit RTI
|
Allowed to edit, create and delete RTI entries |
 |
Edit Link Storage
|
Allowed to edit, create and delete Link Storage |
 |
Edit Link Storage Values
|
Allowed to edit, create and delete Link Storage Values |
 |
Edit Comments
|
Allowed to edit, create and delete Comments |
Giving Service Access to additional users
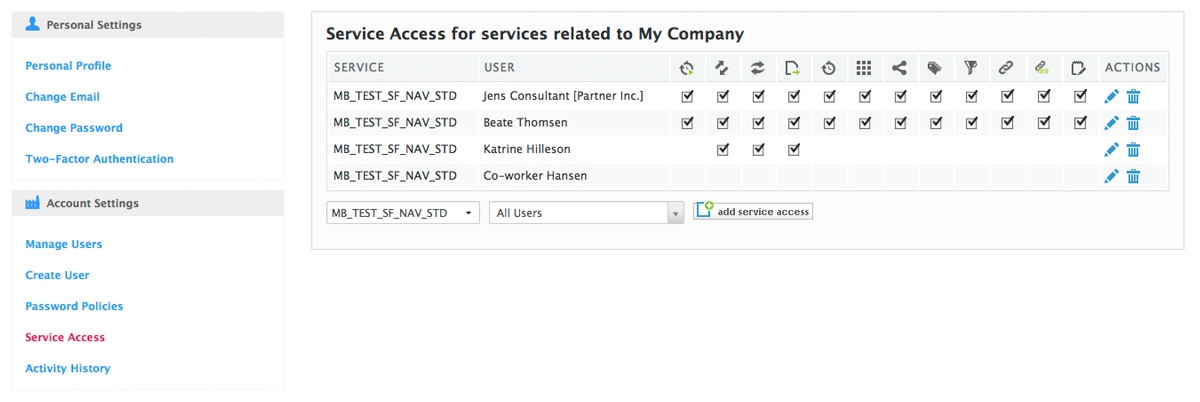
To assign Service Access to additional users on your Account repeat the steps as for yourself. Select the Service and then select the user in the second drop down and click the 'add service access' button.
Check each area that you want the user to have access to and click save (the green validation mark). If you want to give the user access to every area you can simply check the 'select all' checkmark and then click save (green validation mark).
Please note: The areas you can give access to depends on your subscription level. For example the Basic subscription level does not allow access to 'Edit Transfers' and some other areas.
Giving Service Access to external users - Consultants And Rapidi Partners
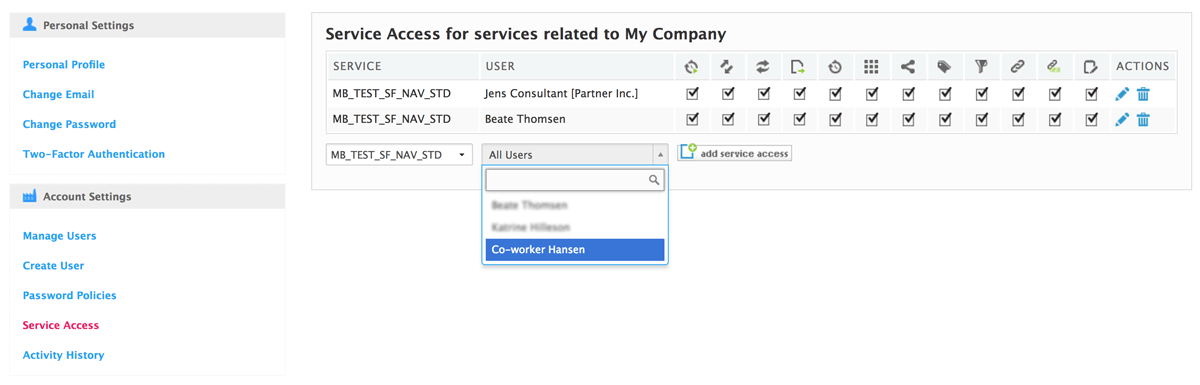
It is now possible to give a Rapidi partner or consultant access to your Service. The Service Access is given for each individual user. If you would like to give a Rapidi partner or consultant access to your Service please contact the Rapidi Team for us to approve this person (a person signed up as a Rapidi partner and trained appropriately). We will assign the user a 'consultant role' which will allow you to search for this user in the drop-down search field and to give the user Service Access (see image below).
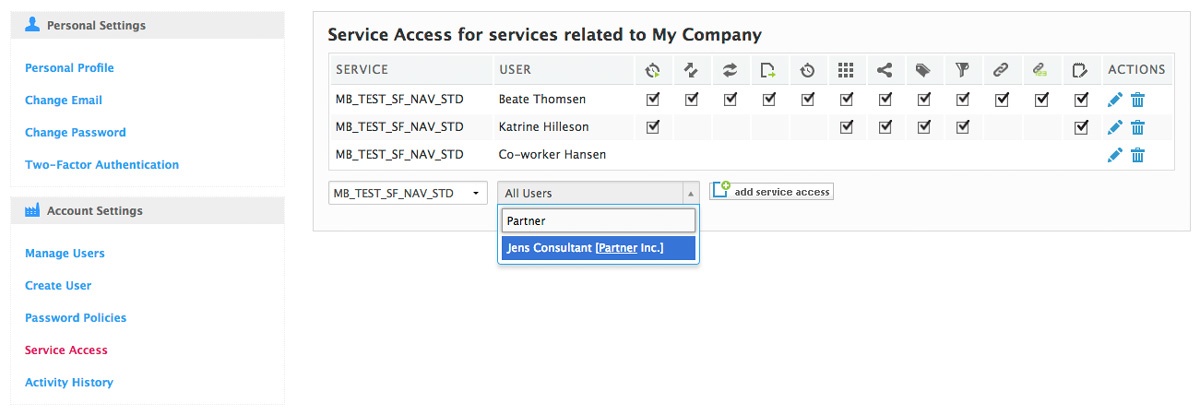
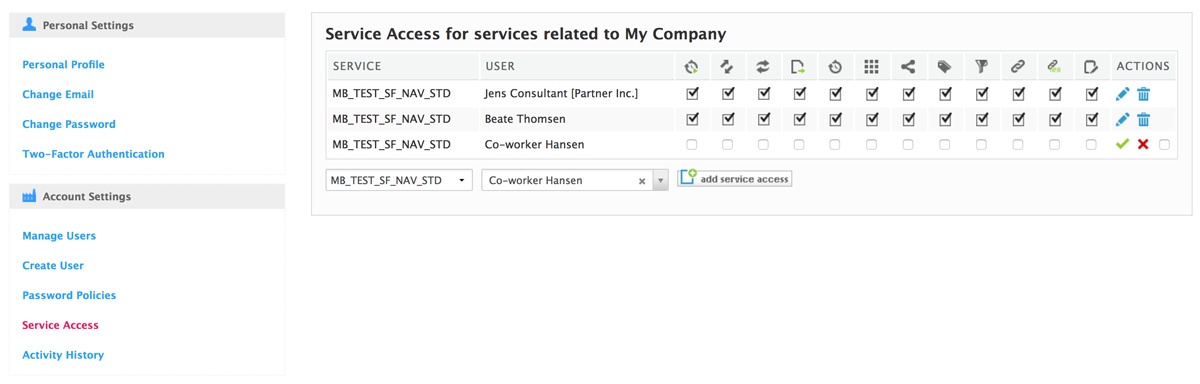
In this example the external user is called 'Jens Consultant' from 'Partner Inc.' You can search his name or company name. Click the 'add service access' button and it will create a 'Service Access entry' for this user. Please assign the user the appropriate rights by checking the appropriate areas in the table and click save. Leaving all areas unchecked will automatically create 'read-only' access for the user.

In the example below there is a more complete list of the users on this account with 'Co-worker Hansen' only having 'read-only' access.
If you are having any trouble setting up the Service Access please don't hesitate to contact our Rapidi Support Team.
We hope you like this feature and as always any comments or questions are very welcome.