
Support for Attachment to from Dynamics 365 Business Central
We are please to inform you that we support transfer of attachments to from Dynamics 365 BC - both read and write.
So, if you have Salesforce, Microsoft Dynamics 365 Sales and would like to transfer attachment to and from those CRM systems to your MS Dynamics 365 ERP such as Business Central, we got you covered. For example you can configure in MyRapidi transfer of attachment from Microsoft Dynamics 365 Business Central to Salesforce. The attachments can be transferred in both directions.
What can you use this for?
Transferring attachments like image and PDF files to from Microsoft Dynamics 365 Business Central gives you several benefits. This integration streamlines business processes, enhances data accessibility, improves collaboration, and contributes to more effective customer engagement and service. Furthermore it can lead to significant efficiency gains and better data management across your organisation.
What formats do we support?
- The attachments from MS Dynamics 365 Business Central must be stored in a stream file format:
- for documents: .pdf and .doc
- for images: .png and .jpeg
Please note: The API V2 tables that are being used to fetch the attachments from Business Central have been available only for Business Central 2020 wave 2 (v17.2) onwards. Older Business Central versions do not have these APIs available anymore and cannot be enabled.
- The attachments content type from MS Dynamics 365 Sales must be stored in a binary format:
- for documents: .pdf and .doc
- for images: .png and .jpeg
- The attachments from Salesforce they would need to be stored in a base64 format.
Before the setup in MYRAPIDI:
Before configuring the attachment transfer from Business Central to Salesforce, the field $systemId (2000000000, GUID) would need to be published in Business Central (an extension needs to be created) for the table in question.
In order to publish/expose the above field, please read our article about how to create and extention in Business Central / Publish SystemCreatedAt field in Business Central and go through all the steps.
Below we will explain a common use case that is transferring attachments from Dynamics 365 Business Central to Salesforce.
Usecase: Attachments to from Dynamics 365 BUSINESS CENTRAL TO Salesforce
A. The required steps in order to transfer attachments from Business Central to Salesforce are:
Steps needed to configure your transfer in myrapidi.com and to be able to transfer files successfully:
1. Set up both Connections in MyRapidi.com:
- Microsoft Dynamics 365 Business Central - The connection type within Rapidi is called MS Dynamics 365 BC (NAV) OData
- Salesforce - The connection type within Rapidi is called Salesforce.com
2. Set up a new transfer in MyRapidi.com as follows:
a) General
Fill in all the fields from the General section of the transfer. Make sure that you select the correct Source and Destination Layouts. (see image below).
Please note: The Source Table needs to be DocumentAttachmentsAPIV2 and the Destination Table needs to be Attachment.
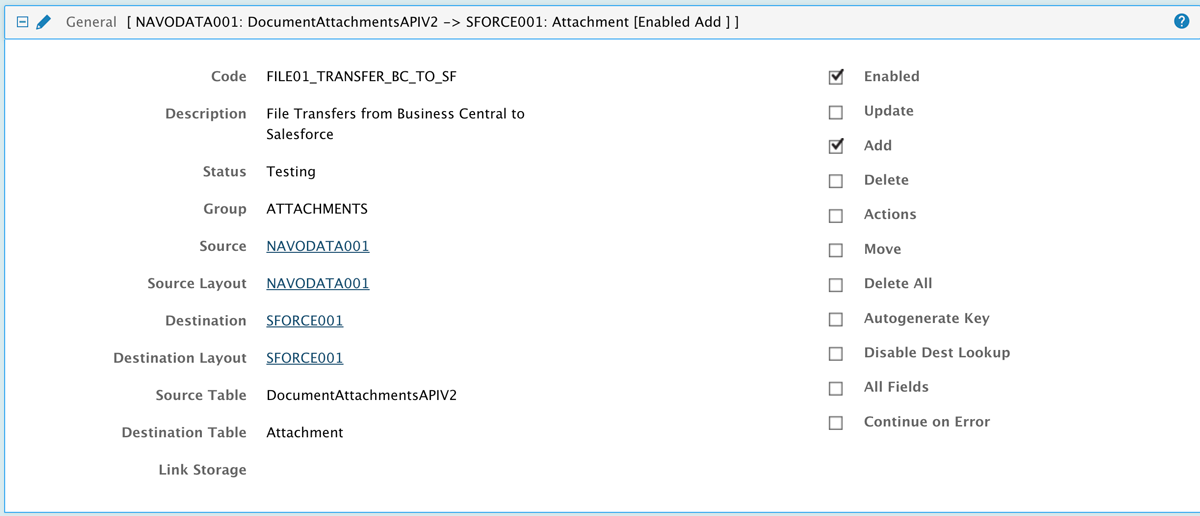
image: General section
b) Source Control
Next, go through Source Control and add any source control (e.g when the attachment has been created) (see image below).
Quick Tip: It’s always recommended to use a timestamp when setting up any data transfer.
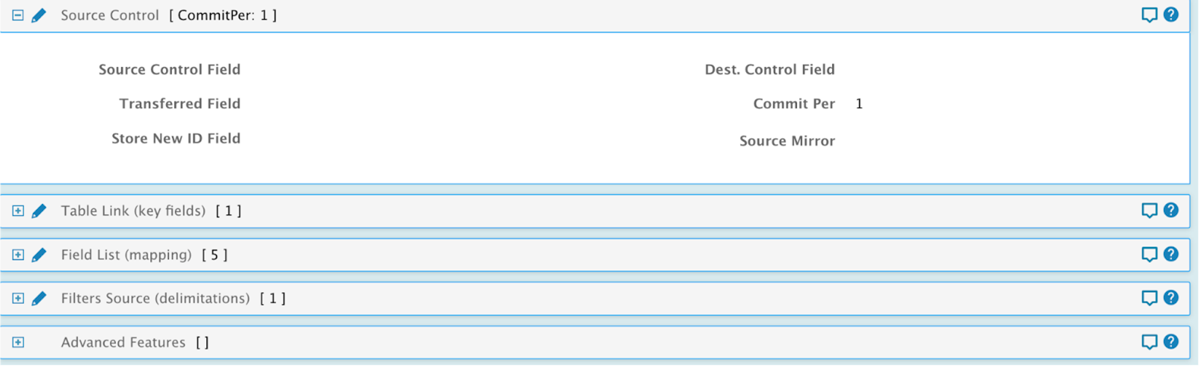
image: Source Control
c) Table Link: Add the primary keys/identifiers in Table Link (key filters).
Then, you need to update the Table Link section (key fields). Here you have to add the primary keys/identifiers that you want to use for this transfer.

image: Table Link
d) Add Field Mapping
Then, under Field List (mapping), you would need to add the fields that need to be mapped. You can add more than you see in the screenshot. The listed fields are the minimum mandatory ones.
- ParentID - This is the Salesforce ID of the record that this attachment should be linked to. The easiest way is to store the Salesforce ID of the record in your ERP so you can use it on this transfer. In Business Central, the parent ID of the record would be the systemID ( in my case, it’s called SystemId53309 because I created an extension for it).
- Body - In Salesforce, all files are stored in a base64 format. And the corresponding field from Business Central is attachmentcontent.
- Name - This would be the name of the attachment that you are transferring to Salesforce. The corresponding field name in Business Central is fileName.

image: Field List Mapping
e) Filters Source
And the last section Filters Source (delimitations) is optional. You can use it to add filters and run the transfer only for a specific record in Business Central.

image: Filters Source
3. Activate changes:
After you have created the transfer and added all the information, make sure to click on Activate Design (at the top of your transfer page) before running a test.
Let's now go through an example use case that transfers attachments between MS Dynamics 365 Business Central and Salesforce.
B. The required steps to Transfer attachments from Salesforce to Dynamics 365 Business Central
1. Create a new transfer in myrapidi.com with the following information:
a) General
Fill in all the fields from the General section of the transfer. Make sure that you select the correct Source and Destination Layouts. (see image below).
Please note: Source Table needs to be Attachment and Destination Table needs to be DocumentAttachmentAPIV2.
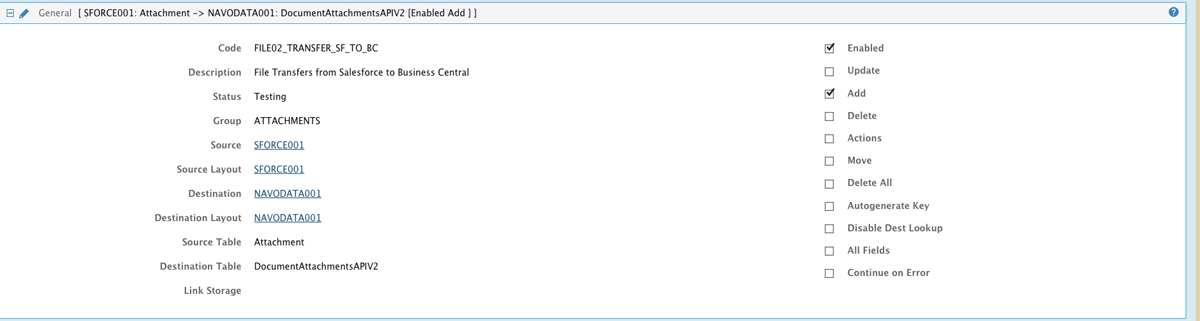
image: General section
b) Source Control
And as mentioned earlier we recommend always to use a timestamp when setting up any data transfer.
So, go through Source Control and add any source control (e.g when the attachment has been created) (see image below).

image: Source control
c) Table Link (key fields)
Next, you would need to add the primary keys/identifiers in the section called Table Link (key fields).

image: Table Link
D) Field List (mapping)
Then, under Field List (mapping), you would need to add the fields that need to be mapped. You can add more than you see in the screenshot below. The listed fields are the minimum mandatory ones.
- ParentID - This is the GUID ID of the Business Central record that this attachment should be linked to. The easiest way is to store the GUID ID of the record in Salesforce so you can use it on this transfer. In Business Central, the parent ID of the record would be the systemID ( in my case it’s called SystemId53309 because I created an extension for it).
- AttachmentContent - In Business Central, all files are stored in a stream format. And the corresponding field from Salesforce is body.
- FileName - This would be the name of the attachment that you are transferring to Business Central. The corresponding field name in Salesforce is Name.
- ParentType - the record type from Business Central.

image: Field List
E) Filters Source (delimitations)
And the last section Filters Source (delimitations) is optional. You can use it to add filters and run the transfer only for a specific record in Business Central.

image: Filter Source
2. Activate changes:
After you have created the transfer and added all the information, make sure to click on Activate Design (at the top of your transfer page) before running a test.
Voila, congratulations you are done with the setup in Rapidi to be able to transfers attachments from Business Central to Salesforce.
Now let's have a look at how the attachments are visible in both Dynamics 365 Business Central and Salesforce after they have been transferred.
Please see the screenshots below.
ExaMPLE : Attachments from Dynamics 365 Business Central TO Salesforce
Here is one example of a PDF attachment (linked to a Sales Order in Business Central) transferred to an opportunity in Salesforce:
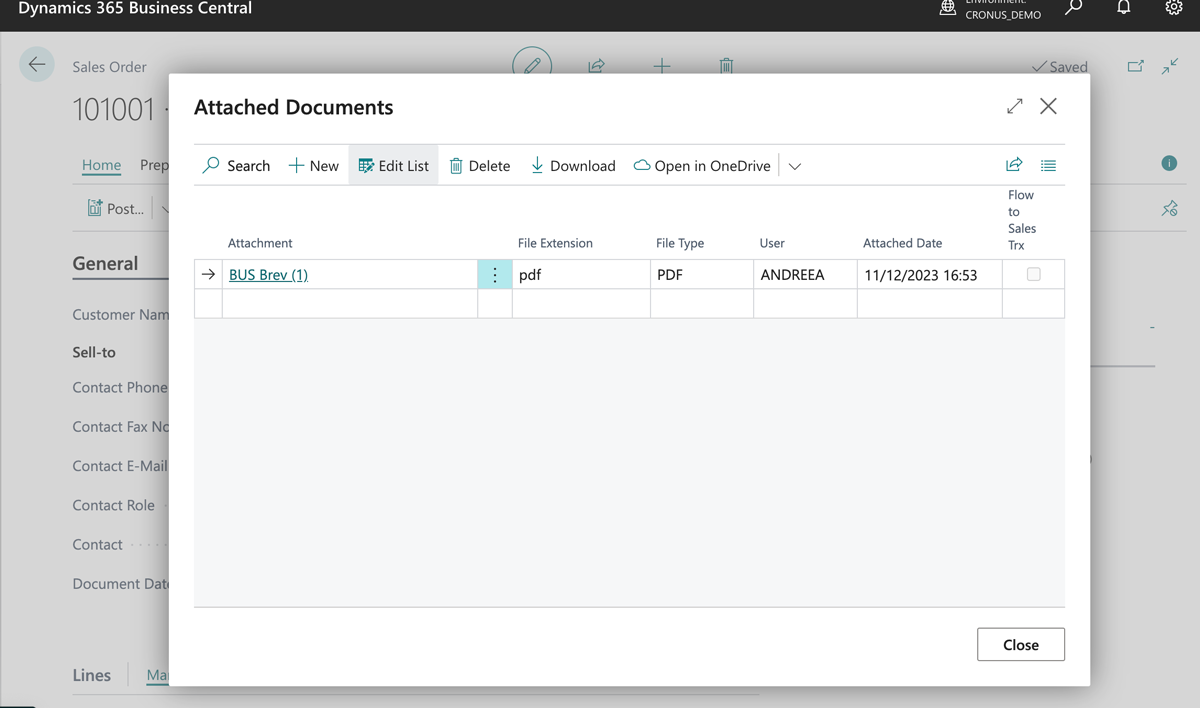
image: Attachments in Business Central
The attachment is stored under the Attached Documents page and it contains all the needed details.
Next, this is how the PDF file looks like in Salesforce:
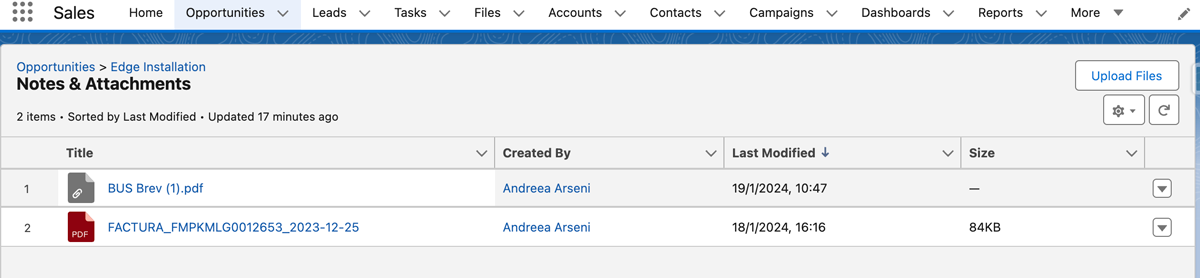
image: view of attachments in Salesforce
The PDF file is saved under Notes & Attachments and it is being linked to the Salesforce opportunity.
I hope you enjoyed this walkthrough. If you have any questions and need assistance in setting up your attachment transfers always feel free to reach out to the Rapidi Support Team